While you are able to manage the time on the computer manually, it can be tedious to update the time yourself if you change time zones or during Daylight Savings Time. Additionally, some websites may not function correctly if your time is not correct. Our guide below will show you how to have Windows 10 handle the time automatically so that you don’t need to worry about it.
How to Enable Automatic Time Updates in Windows 10
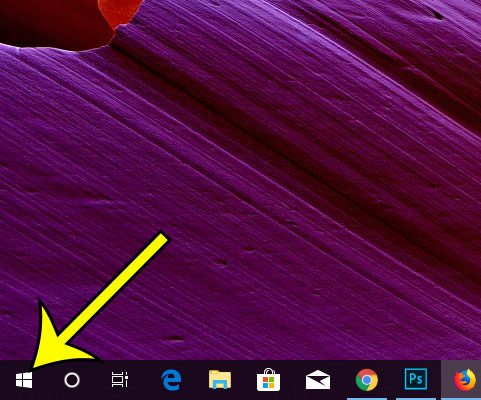
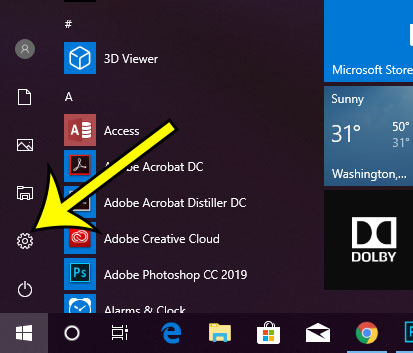
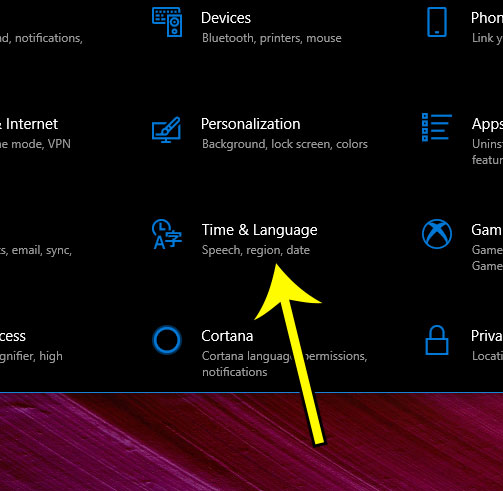
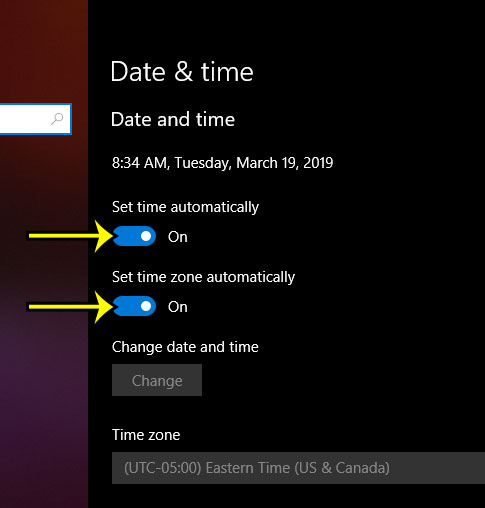
The steps in this article were performed on a laptop computer using the Windows 10 operating system. Once you have completed these steps your computer will automatically keep the time updated based on your current location. Step 1: Click the Start button at the bottom-left of the screen. Step 2: Select the gear icon. Step 3: Choose the Time & language option. Step 4: Enable the options for Set time automatically and Set time zone automatically. Are you about to copy a lot of files to your computer, or install some large applications? Learn how to see your available storage in Windows 10 to ensure that you have enough space on your computer for everything. He specializes in writing content about iPhones, Android devices, Microsoft Office, and many other popular applications and devices. Read his full bio here.