Photoshop provides two different ways for you to lower the file size of a JPEG file. Our guide below will show you both of the ways to accomplish this.
Here are two methods for making JPEG file sizes smaller in Photoshop –
Method 1 –
Method 1 with pictures –
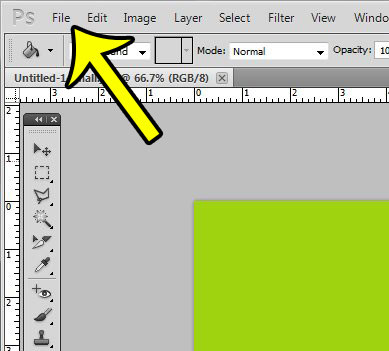
Step 1: Click the File button at the top-left of the window.
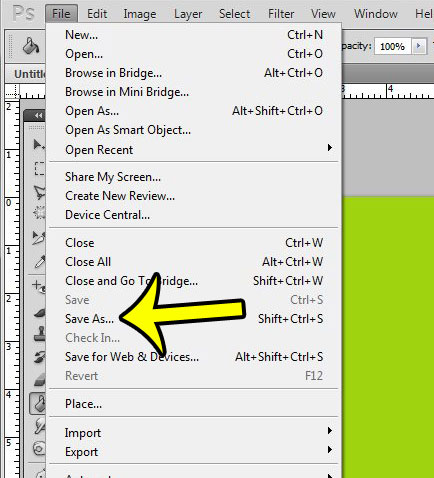
Step 2: Click the Save As option.
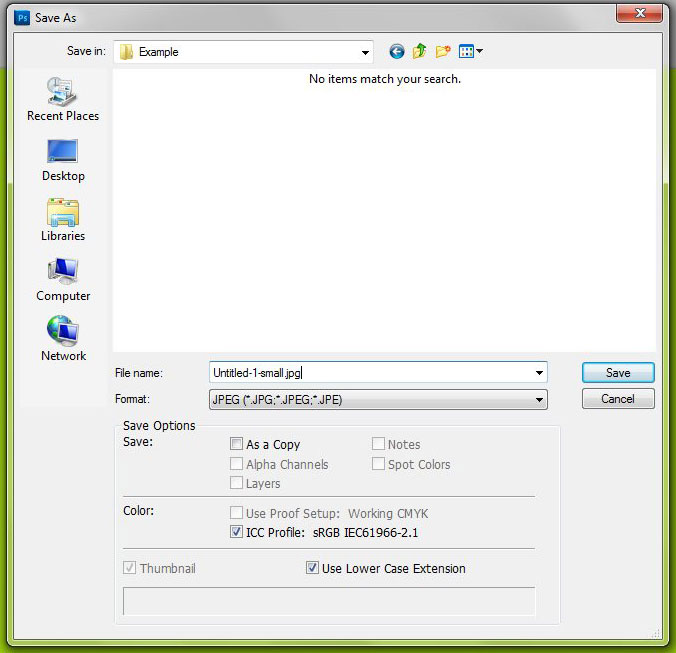
Step 3: Change the name of the file in the File Name field to something different so that you don’t overwrite the original file, make sure that JPEG is selected in the Format drop-down menu, then click the Save button.
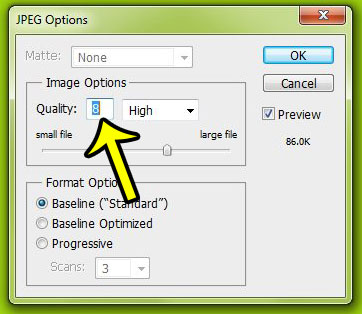
Step 4: Lower the number in the Quality field. Note that the file size under Preview should be lowering as you lower the value. I like to use 8 as my quality when I am concerned about file size. Once you are done selecting a value, click the OK button.
Method 2 –
Method 2 with pictures –
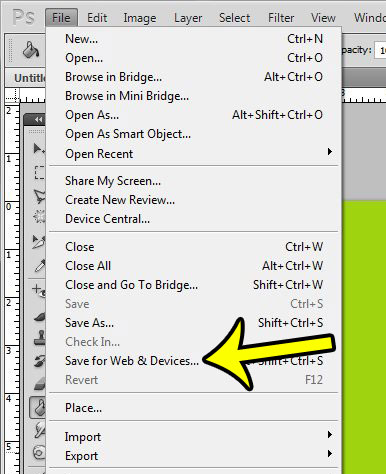
Step 1: Click the File button at the top of the window.
Step 2: Click the Save for Web & Devices option.
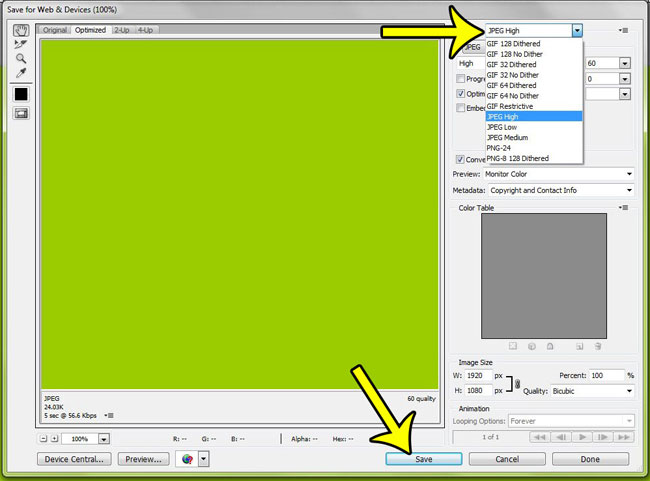
Step 3: Click the Preset menu at the top-right of this window, click one of the JPEG options (I like to use JPEG High, but using Low or Medium will give you a smaller file size at the expense of image quality), then click the Save button.
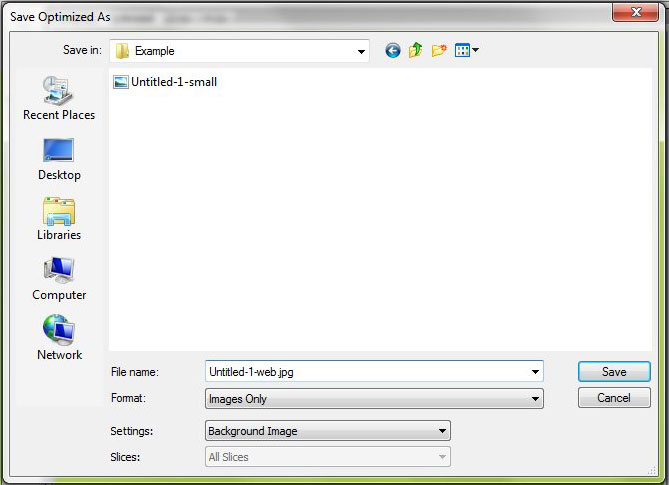
Step 4: Browse to the folder in which you would like to save the file, change the name of the file if you wish, then click the Save button.
Would you like to change the size of one of the layers in your Photoshop file without affecting everything else? Learn how to resize a Photoshop layer instead of resizing the entire image. He specializes in writing content about iPhones, Android devices, Microsoft Office, and many other popular applications and devices. Read his full bio here.

