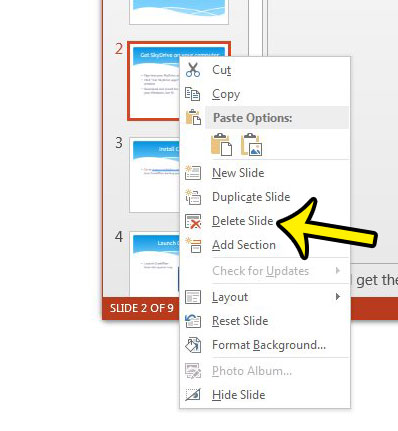
A presentation that you create in Powerpoint 2013 may undergo a number of changes from the initial draft. These changes may even force you to remove an entire slide from the presentation. But you may be having difficulty locating the tool or button that will allow you to remove an existing slide from your slideshow. Fortunately you are able to delete individual slides using a command that is found on the right-click shortcut menu. Our tutorial below will walk you through the steps.
How to Delete a Slide in Powerpoint – Quick Summary
For additional information, such as hiding a slide instead, as well as pictures for each of these steps, then continue to the section below.
How to Remove a Slide in Powerpoint 2013
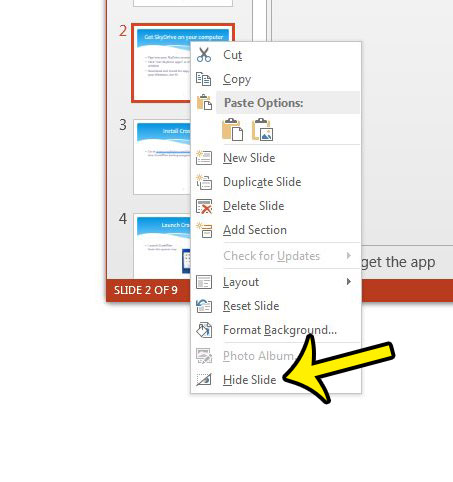
The steps in this guide are going to delete an entire slide and its contents from your presentation. if you have added page numbers to your slideshow, then those page numbers will automatically update to reflect the removal of the slide. Click here if you are a Google Slides user and would like to know how to delete slides from that application as well. If you only wish to remove the slide from the presentation, but do not want to remove it, then you can elect to hide the slide instead. To hide a slide, right-click the slide as you did in step 3 above, but click the Hide Slide option instead. As mentioned earlier, deleting a slide will cause your page numbers to update. However, page numbers will not change if you have hidden a slide. Therefore it may be less confusing for your audience if you remove the slide numbers for presentations with hidden slides. If your presentation is very large and contains a number of high-resolution images, then the file size could be quite large. This can be a problem if you need to share the file through email. One way to reduce the file size of Powerpoint 2013 presentations is to compress the images. He specializes in writing content about iPhones, Android devices, Microsoft Office, and many other popular applications and devices. Read his full bio here.


