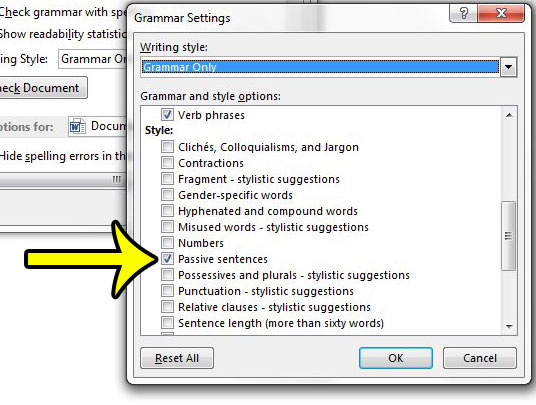
The grammar tools in Word 2013 are very robust, but not all of the options are enabled by default. Our guide below will help you to find the option within the program that will allow you to check for passive voice in your Word documents.
How to Use the Passive Voice Checker in Word 2013
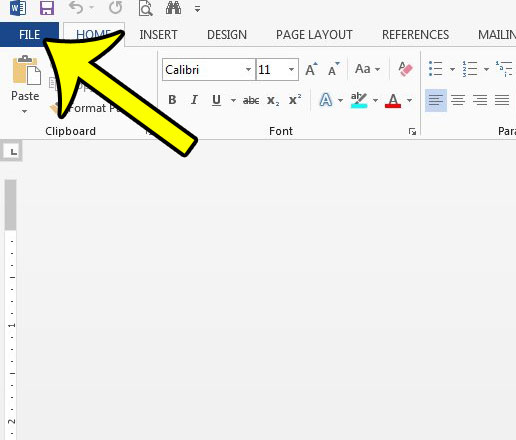
The steps in this article were performed in Microsoft Word 2013. Once you have completed this guide, Microsoft Word will check for passive voice usage when you run the grammar checker. If you would like to stop checking for passive voice in Word 2013, then you can simply choose to uncheck the Passive sentences box instead of checking it. Step 1: Open Microsoft Word 2013, then click the File tab at the top-left corner.
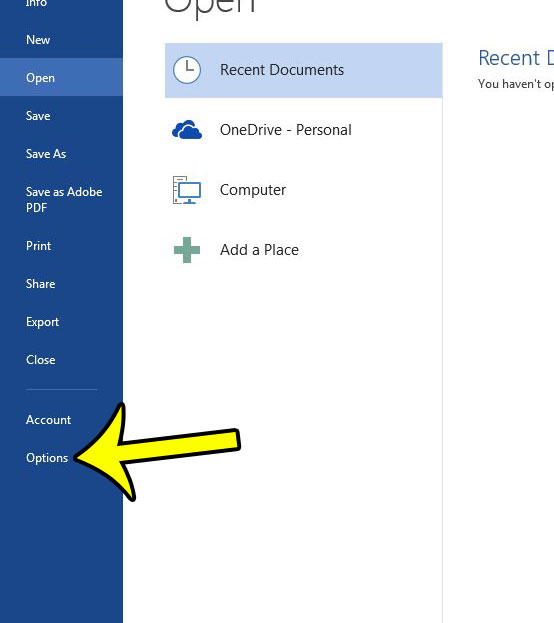
Step 2: Click the Options button at the bottom of the column on the left side of the window.
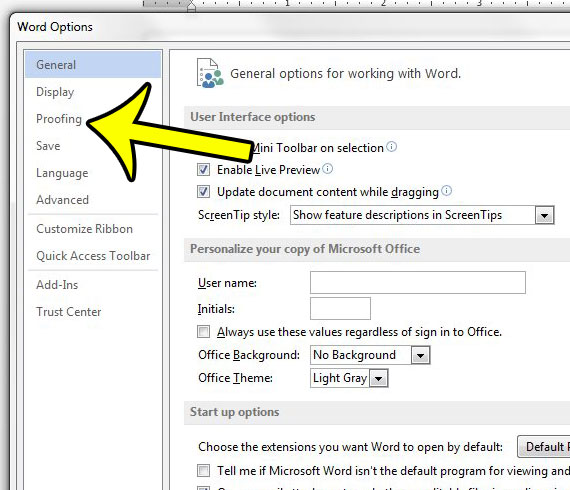
Step 3: Click the Proofing tab at the left side of the Word Options window.
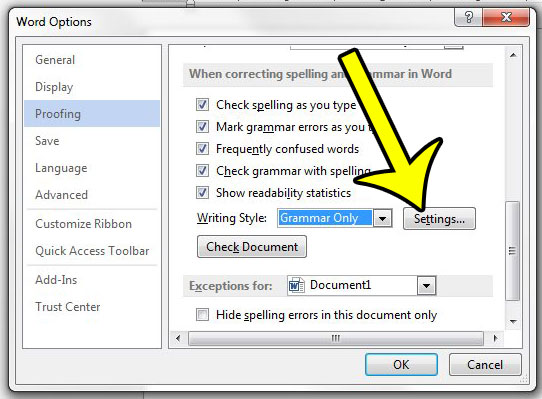
Step 4: Scroll down to the When correcting spelling and grammar in Word section, then click the Settings button to the right of the Writing Style option.
Step 5: Scroll down to the Style section of the menu, then check the box to the left of Passive sentences. Click the OK button at the bottom of the window when you are finished.
Summary – How to check for passive voice in Word 2013
Note that there are a number of other grammar settings that you can adjust from this menu as well. If you find that you Word is either missing certain types of grammar issues, or that it is constantly trying to fix items that you do not wish to fix, then you can adjust those settings from this menu. Does your school or job require you to double space your documents? Learn how to change line spacing in Word 2013, as well as how to change the default spacing setting to double spaced. He specializes in writing content about iPhones, Android devices, Microsoft Office, and many other popular applications and devices. Read his full bio here.
