One of those settings is the time on the computer. This is displayed at the bottom-right corner of the screen, and is used by many of the apps and programs on the computer. Typically most people like to use the automatic option because it’s just easier, and it will handle things like Daylight Savings Time without any intervention from you. But situations might arise where you want to change your time manually, or where you want to change your time zone. Our guide below will show you how to change your time zone in Windows 10.
How to Manually Change Time Zones in Windows 10
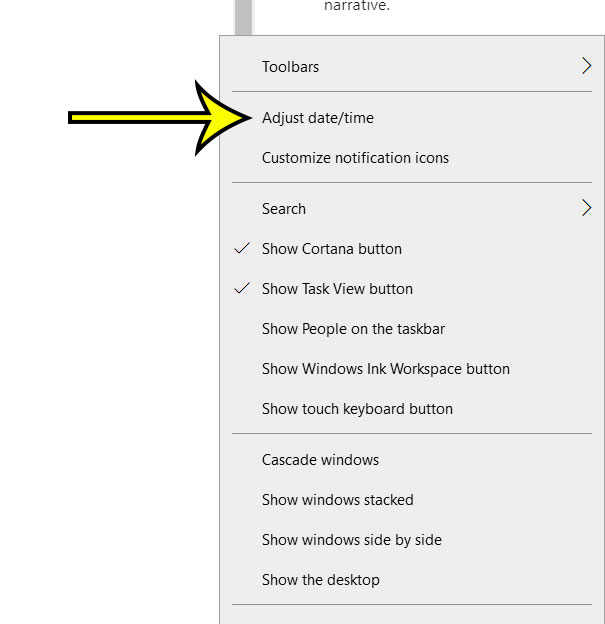
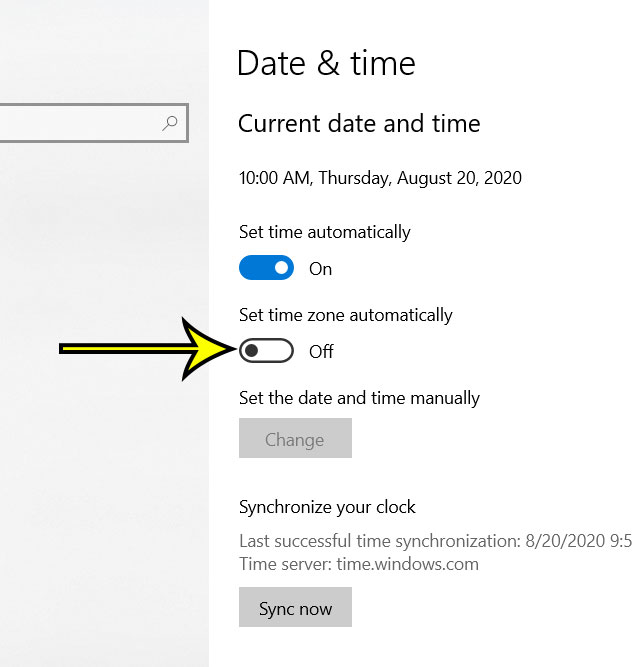
The steps in this article are going to show you a quick way to get to your computer’s time settings and make adjustments. Step 1: Locate the time and date at the bottom-right corner of the screen. Step 2: Right-click on the time and choose the Adjust date/time option at the top of the menu. Step 3: Click the button under Set time zone automatically to turn it off. Step 4: Click the Time zone dropdown menu and choose the desired time zone. The time will update automatically based on the zone that you select.
Additional Reading
How to unzip files in Windows 10How to put a Google Chrome icon on the desktop in Windows 10How to stop the Windows 10 Start menu from being full screenHow to create an alarm in Windows 10How to set up Windows 10 without a Microsoft account
He specializes in writing content about iPhones, Android devices, Microsoft Office, and many other popular applications and devices. Read his full bio here.